Wednesday, May 20, 2015

War of the Weeping Statue

Time for the battle report for my 20th game of Warhammer Fantasy in 2015. I'm on pace for 40 games, which is pretty nice (and a whole lot of Warhammer). This game was a four player Triumph and Treachery game, with 1,500 points each plus 300 points of mercenaries. Or at least it was supposed to be (more on that later).

First up, my painting progress. I managed to add six new models to my collection for this game. I have been playing my Dwarfs a lot lately, so I felt like switching it up for Triumph and Treachery game and played my Skaven force. Most of my Triumph and Treachery games lately have been 2,000 points, and Mercenaries are 100 points for every 500 in the main force. Thus, 300 was a little less than the usual, and I didn't really have any good options for allies at that level with my Skaven (no way I was taking Dwarf allies... they would never sully themselves to work with Skaven). So I decided to add some new options, using the Storm of Magic units.

Three Unicorns

I decided to field a Dark Emissary as the Mercenary Captain, and added three Deepforest Unicorns to my force to be the Mercenary units. They can be bought in units of 1-5, and I ran them as three separate individuals. They were intended to be War Machine hunters, as their movement of 10" is fantastic. I modified the stags from the Wood Elf Wild Riders/Sisters of the Thorn kit to be a single horn. That way I can use them as a unit of Great Stags as well for higher-points games or Storm of Magic games. I have two more that will fill out the rainbow: one a yellow-green and one a green blue.

 Two Clanrats with hand weapons and shields

I also added some more Skaven models to my force. I got in a good rhythm with my Dwarfs of completing rank-and-file models, and that's something that desperately needs to happen with my Skaven. So I managed to add two more Clanrats to the force. I know they're only 12 points of the army, but every bit helps.

 Ratling Gun

I also added an option to go with their larger unit: a Ratling Gun. My usual preference is Warpfire throwers for the army, as they just make me laugh too much to not include them. But I wanted to have some options--and the Ratling Gun is a somewhat reliable choice (as Skaven models go). It can generally get between 6-10 shots without too much jeopardy, and the shots hit hard. Plus I like that the ratman in the back is cranking the weapon and grinding the bits of warpshard that are fired from the gun. 

For the battle, my Skaven were facing off against Travis' Brettonians, Roger's Wood Elves, and Tom's Lizardmen. The points were 1500 per side, with 300 points of mercenaries each. However, there was some confusion on the points cost--we found out only at the end of the game that Tom brought 1,800 points. I think I was the source of the confusion, not remembering that we usually do 2,000 for 3-player, 1,800 for 4-player, and 1,500 for 5-player. And my goof was spread to all the players but Tom (who went with the normal amount). In the end it was a fun game and the variance in army sizes was not a game-changing difference in points, so it's all good. On to the battle report!

The small council of dark magics. Given that I've been doing Dwarfs for a while, it was time to go heavy on the magic use. So I fielded four casters with four different lores. From left-to-right: The Dark Emissary Mercenary with the Lore of Shadow, Warlord Ripear wearing his Wizarding Hat magic item (which randomly generated Heavens Lore for this game), Engineer Gnawfire with the Skaven Lore of Ruin, Plague Priest Cardinal Fang with the Skaven Lore of Plague. 

My main force was a block of Stormvermin and a block of Clanrats, supported by Rat Swarms, small "rat dart" units of Giant Rats, Slaves, and the three Unicorns summoned and enslaved by the Dark Emissary for his nefarious purposes. A unit of three Stormfiends are not shown here, as they were busy burrowing their way to the battlefield. 

The Bretonnians were considerably constrained by the small deployment zone (a 12" radius half circle from a point on a board edge), and two whole knights units were unable to start on the table. What began on the table was a big block of Knights, a unit of peasants, a unit of Pegasi Knights, and two Trebuchets. They were joined by a High Elf Mercenary Captain leading a unit of Dragon Knights. 

The Wood Elves brought even more trees with them, and deployed in a small grouping around them. Their leader was a massive Treeman, supported by a unit of Treekin, a block of Eternal Guard, and a unit of Archers. The skirmishing Waywatchers used their scout deployment to man a barricade close by the their starting zone. And for Mercenaries, the elves brought along what they thought was another Treeman--however, it was actually a tree that was cursed and infested with the trapped spirit of a Khorne Daemon Prince (using those rules). 

The Lizardmen force was led by Kroq-gar on his mighty Carnosaur, along with a large unit of Saurus Cold One Knights, a block of Saurus warriors, a big Skink Cohort, and a unit of Skink Skirmishers. For Mercenaries, they were joined by two human wizards: one with the Lore of Beasts and one with the Lore of Fire. 

The battle began with savagery, as the Lizardmen spurred their Cold One mounts to try and strike the Bretonnian peasantry. They failed their charge only barely, and thus were counter-charged by the massive column of Bretonnian knights--led by the Bretonnian general. While the Egg of Quango slew three knights, the rest of the knights went unscathed from the Lizardmen's strikes--and the knights cut down six of the riders themselves. The Lizardmen fled, and were not caught by the knights. Shaken but still ready to fight, they rallied on their turn.


The general of the Wood Elves was a massive and ancient Treeman, and he ran toward the objective. There was a cursed statue in the center of the field, its eyes weeping blood. The Sinister Statue fired bolts of damaging negative energy from its eyes, but yet the armies each wanted to secure it for themselves. Due to the magics of the statue, only the general of each army could carry the statue (the particular Triumph and Treachery mission we got was the one with the objective in the center, and the statue was randomly generated in terrain set-up prior to the mission--so we figured "why not have to carry the deadly statue?). However, in the Treeman's zeal to reach the statue he became the target of enemies. In particular, the Bretonnian Trebuchets ranged in on him--the massive stone crashing down from the sky above managed to destroy the living plant in a single burst of destruction. 

While the Bretonnians were focused on the Lizardmen and Wood Elves, my smaller Skaven units started clogging up charge lanes and reading for assaults--trying to discourage the left flank of the Bretonnian army from heading my way.

The Eternal Guard of the Wood Elves, joined by a Treesinger mage, were assaulted by the Rat Swarms and a Unicorn. The forest was a Venom Thicket, which gives all models within poisoned melee attacks--that proved to be a deadly tool for the swarms and the normally elite infantry only managed to beat my units by one point, and both held firm in the fight. 

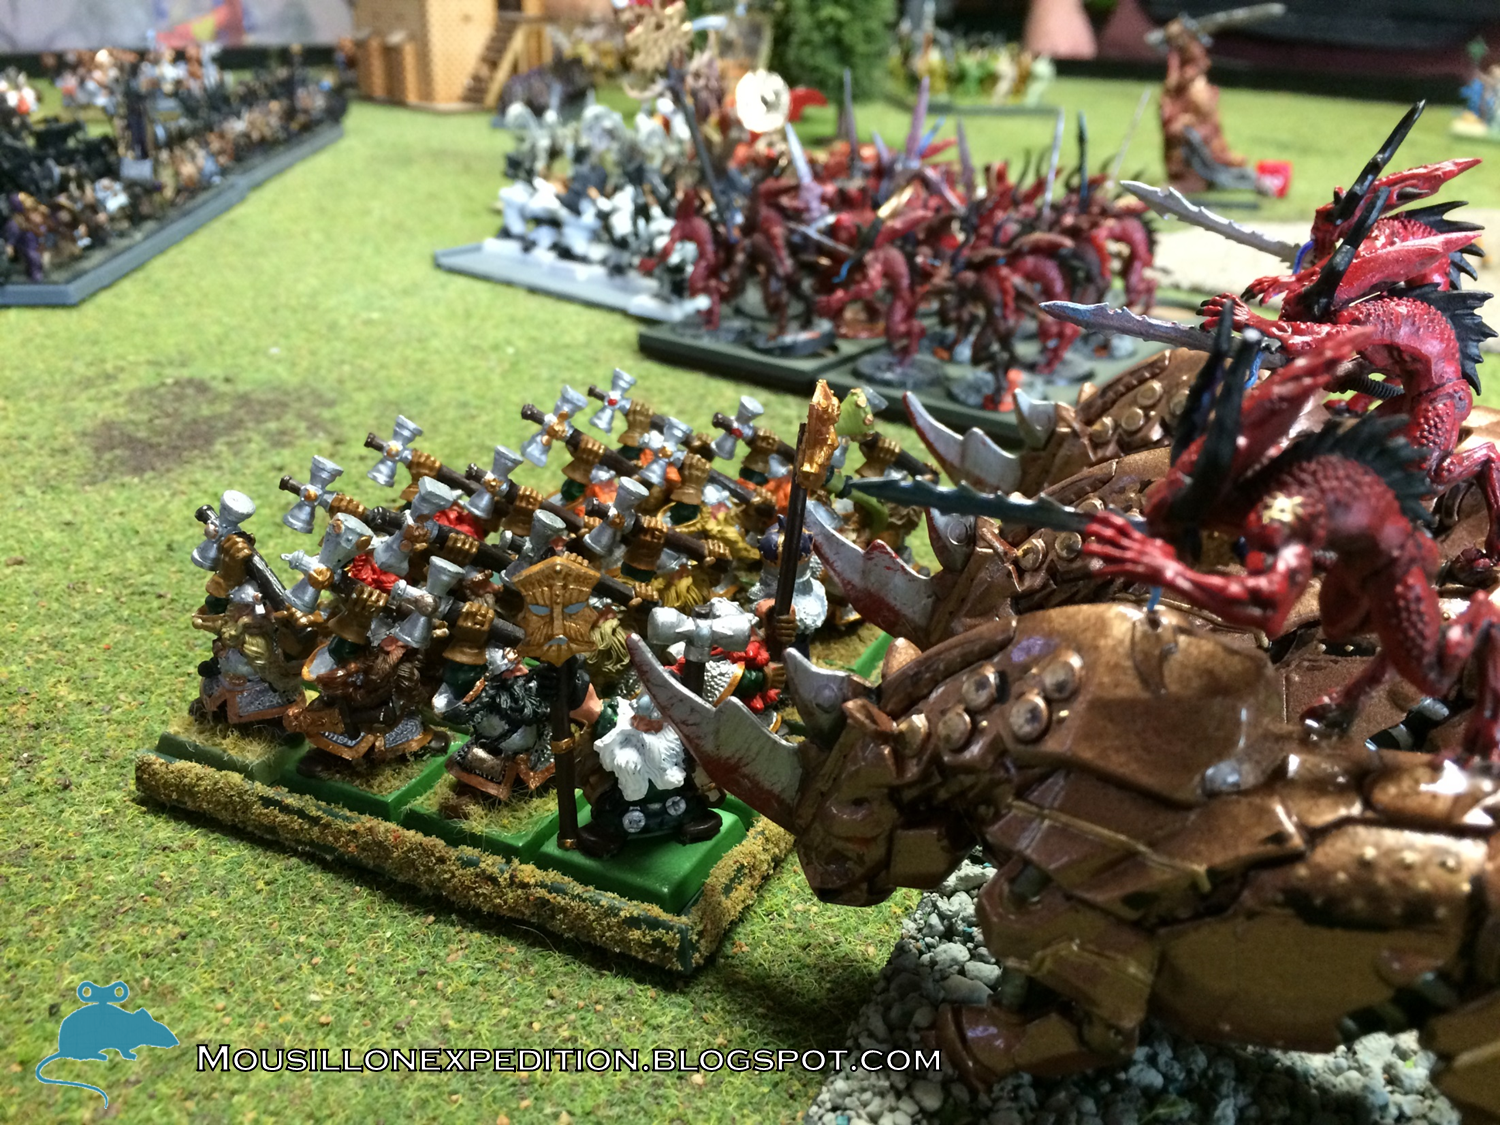
The rage-demon bound inside the wooden effigy ran forward and attacked the Lizardmen. While it slew a number of Skinks in the Cohort, it was not prepared for the savagery of the massive Kroxigors that accompanied their smaller brethren. With brutal roars, their crude great weapons tore the wooden structure housing the Khornate daemon to shreds in an instant, leaving it utterly demolished and the Wood Elves down another of their powerful tree spirits.

The Skaven Stormfiends proved to have a disastrous day. Their first attempt to arrive went awry, with them lost in the tunnels beneath the battlefield. On their second they came up right in the Khemrian Quicksand and one of their number drowned right before they failed a charge against the Wood Elves. The Wizard accompanying the Lizardmen then launched a magical spear at them, killing the second of their trio outright. The remaining one fled immediately (above)... only to wind up right in the path of Kroq-gar who chased him down and destroyed him with ease. 

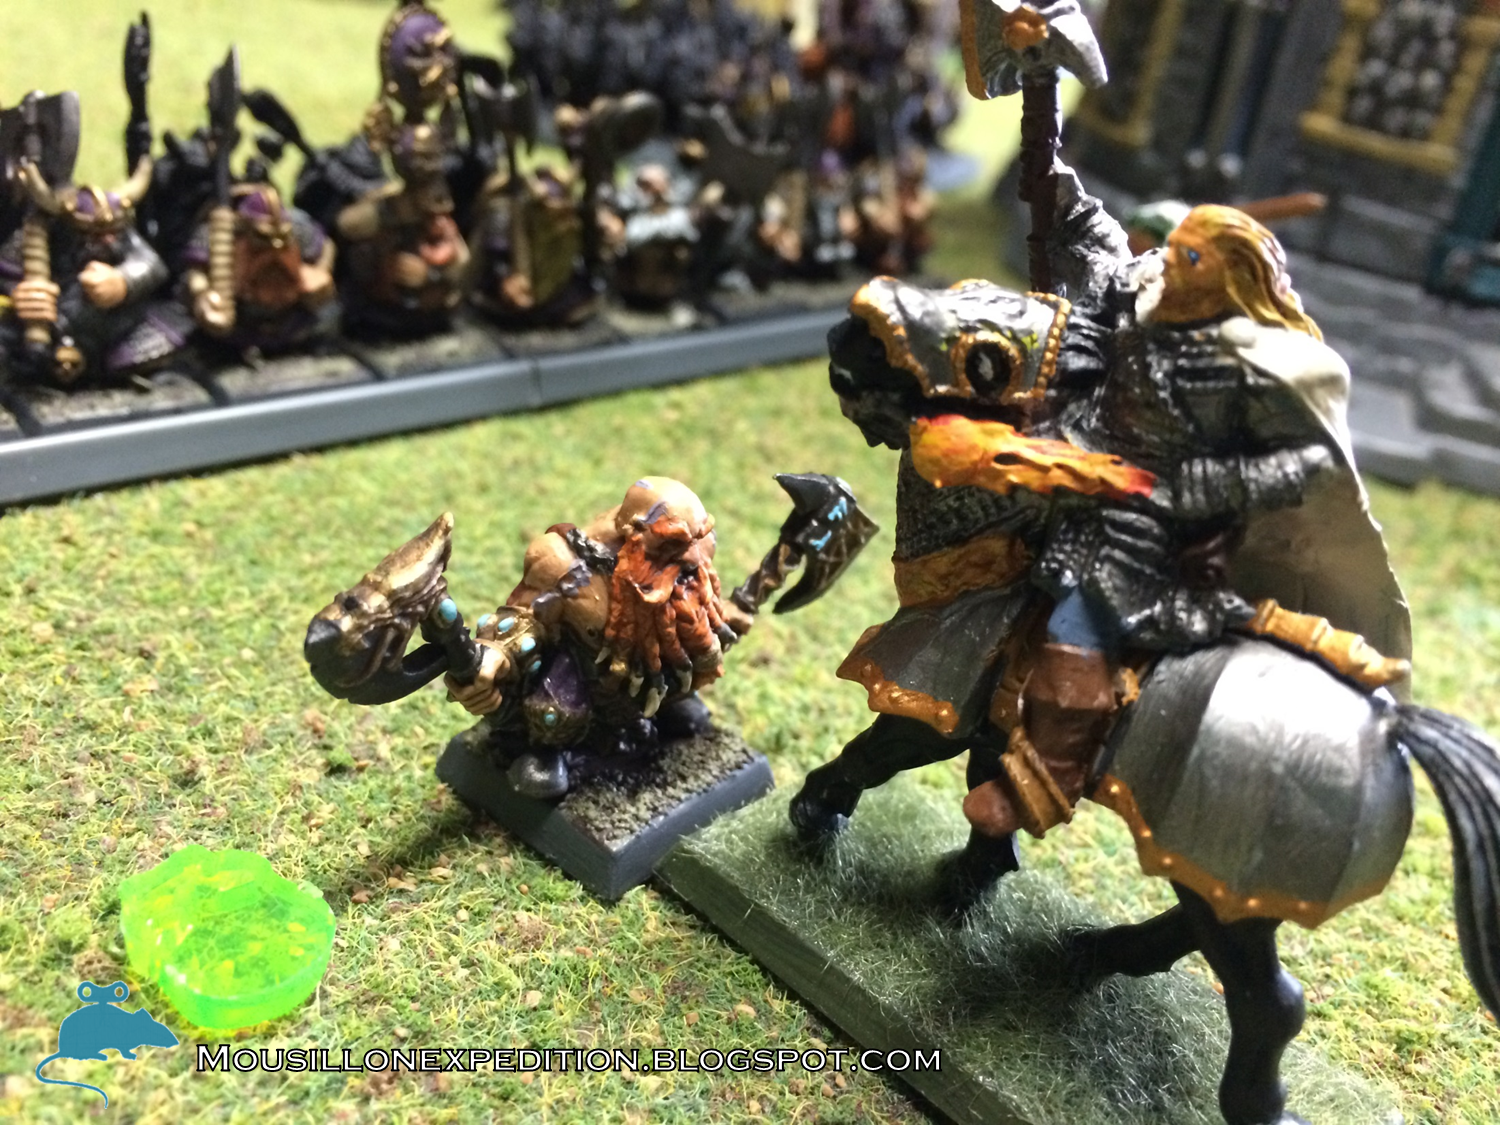
The Beasts Lore Wizard's glory was short-lived however, as the Bretonnian general was able to charge her from behind shortly after her magical assault on the Skaven. With no mercy, he rode her down under hooves, slaying her with a single strike that took her head clean off: a "not-so-heroic" attack with heroic killing blow special rule. 

Meanwhile the Bretonnian Knights Errant proved their recklessness by charging straight across the Khemrian Quicksand into the side of the Saurus Warriors. While three died to the sand, the resulting combat demolished the Lizardmen and they were run down by the mounted foes. 

The Bretonnians continued to plague the Lizardmen. Even when the rallied Saurus Cavalry managed to strike the flank of the Bretonnian knights, the knights didn't break. After one turn that ended with a small Bretonnian win (and reform to face), the Knights won and the Lizardmen fled. They were so close to the edge of the battlefield that the Bretonnians decided not to give chase, but reform. Tom's ability to roll all 1's on attack rolls should have been a clue, however, as the Saurus cavalry fled only two inches and remained on the board--denying their points to the Bretonnians who were now facing the wrong way. 

The Skaven magic phase proved to be less than thrilling, despite all the casters. I got some good bursts of Warp Lightning off, but otherwise it was a pretty minimal set of phases. The looming presence of the Bretonnian Pegasus Knights behind my lines left me out-flanked and with sub-standard targets for my magical destruction.

The Warpfire thrower had a moment to shine, when it was charged by the remaining Eternal Guard with the Wood Elf Archers politely directly behind it. And of course, given the state of Skaven luck that far in the game, the device misfired. Instead, it suffered a fuel leak and bolted in a random direction--right into my rat swarms--and blew up in a massive explosion. A template weapon that does d3 wounds is a sore thing for swarms (which take double wounds), and it ended up inflicting 10 wounds total--two bases gone and one left with a single wound. 

My last chance to have an impact on the game was the end, but both my magic and shooting failed to finish off Kroq-gar (which would have left my Skaven general--Warlord Ripear--closest to the objective at the end of the game. But the Ratling Gun couldn't get enough shots to wound, and the magic was limited. The game ended with Kroq-gar savagely wounded but alive and in possession of the statue. 

The Skaven left without the statue, watching the field won by the Bretonnians and the statue ripped out of the ground and carted off by a massive Lizardman Oldblood mounted on a Carnosaur. Warlord Ripear felt discouraged at first, but then remembered: it was the Blue Rat who sent him on this mission. Ever since Ripear had recovered his magical hat--which gave him magical knowledge unparalleled even among the Grey Seers--the Blue Rat had been giving him ever more difficult missions. A simple thought dawned on him. The statue was cursed, and he had seen the bolts of black energy it continued to spew at the Lizardmen even as he carried it. Ripear realized that maybe it had been a trick all along--that the Blue Rat would be pleased with either recovering the statue or pleased with Ripear's death to the statue. Coming back empty-handed might have been the best option after all. 

Despite Kroq-gar's success at capturing the statue--gaining the 500 victory points it awards--that was not enough for the Lizardmen to surpass the victory points total of the Bretonnians. Their Knights had savaged the Lizardmen, while their shooting had decimated a very expensive Wood Elves general. My forces ended up mostly intact other than the Stormfiends and the Rat Swarms, but had hardly inflicted enough casualties or won enough battles to compete. Travis' Bretonnians won with 1650 victory points, with Tom's Lizardmen close behind at 1350. Roger's Wood Elves and my Skaven brought up the rear with 650 and 900 points respectively. As always, the fun of the game outweighs the need to win, and it was a great battle with good folk. 

Battles
Total 2015: 20 (Win/Loss/Tie: 12/6/2)
Total 2014: 15 (Win/Loss/Tie: 8/6/1)

Skaven:
7 Wins (Undead 2, Empire 1, T&T Daemons and Dwarfs, Siege Dwarfs and Bretonnians, T&T Daemons and Empire, T&T Dual Undead)
9 Losses (Lizadmen 1, Skaven 1, Empire 1, Dwarfs 1, Daemons 1, T&T Daemons 1, T&T Dwarfs 1, Special Game Nurgle, T&T Bretonnians 1)
1 Tie (Empire 1)

Dwarfs:
11 Wins (High Elves 1, Lizardmen 1, Dwarfs 3, Wood Elves 2, T&T Undead and Dwarfs, T&T Lizardmen and Wood Elves, T&T Chaos Legions and Lizardmen, Team Daemons and Tomb Kings)
2 Losses (Dark Elves 1, Empire 1)
1 Tie (T&T Dual Undead)

Monday, May 18, 2015

Necromancy and Daemonology versus Good Old Great Axes

Time for another Warhammer battle report with my growing Dwarf Throng. A huge team battle that paired my Dwarfs with another Dwarf army against a combined Chaos Daemons and Tomb Kings force with 6,000 points per side. First up, new painting (not much this time, as this game was only two days after my prior game):

 Female Runesmith

This model is a female Dwarf from Scibor Miniatures, a European miniatures company that does some amazingly complex sculpts in the same scale as Games Workshop miniatures. I wanted to add some female commanders to my army, and thus I converted this one with a shield swap (so it matched all the GW shields) and weapon swap. I'm pretty happy with the model, as it has the same size and general look of the others. Plus, it allowed me to field a third Runesmith--for all sorts of runes of spellbreaking shenanigans in the battle.

As for the battle itself, I had a 3,000 points list of Dwarfs that teamed up with 3,000 points of Tom's Dwarfs. We faced off against 3,000 points of David's Chaos Daemons and 3,000 points of Shelly's Tomb Kings. For the mission we got a diagonal deployment across the board, with Chaos/Tomb Kings deploying first right up at their line, and the Dwarfs taking a more withdrawn stance in their corner to match their defensive nature. Below are pictures of the battle lines and close-ups of units, followed by the events of the battle.

 The combined horde of the enemy, bound together with Necromantic and Daemonic magics. 

 The stalwart line of Dwarfs, their strong axes and gunpowder weapons ready to banish their unholy foes.

 Tom's Thunderers took cover in the tall building near our side of the line--clouds of smoke filled the air with their fire. 

 On the Dwarf left flank, Tom's unit of Trollslayers led by a Daemonslayer led the way, supported by a cannon and a block of Warriors. 

 The center of the battle line was mixed, with my forces providing a bristling shooting line at the very front, and Tom's heavy infantry ready behind to counter-charge should the unholy foes break through at any point. 

 The right flank of the Dwarfs featured my units led by my own block of Trollslayers accompanied by a Daemonslayer. Tom's unit of Hammerers with a Runesmith held the very rightmost side of the line. 

 The enemy's Daemons of Chaos were varied yet uniformly vile in their countenance. Units of Bloodletters and Plaguebearers held the line side-by-side, commanded by a Daemon Prince of Tzeentch behind them. 

 The Tomb Kings were led by the the massive chariot of Settra the Imperishable, commanding an enormous group of deadly chariots with him--plus blocks of skeleton warriors following behind. Though their unholy deals were evident, as they were supported by a Great Unclean One. 

 The waves of Skeletons and Khornate daemons seemed endless. A second Daemon Prince--this one bearing the Mark of Khorne--led the left side of the force. 

 Two units of different vile magic: the Casket of Souls for the Tomb Kings with its withering, age-increasing magics, and a massive Soul Grinder of Tzeentch--it's warped arcano-techno form able to project disgusting gouts of phlegm. 

 Three Bloodcrushers of Khorne lurked behind a forest, ready to ride their massive, molten brass steeds into the heart of the Dwarf lines. 

 The ranged support of the armies: Screaming Skull Catapult and Skeleton Archers for the Tomb Kings, and the Blue Scribes of Tzeentch (with a great conversion using D&D miniatures Abyssal Maw figurines) and a Skullcannon of Khorne (using the very old Chaos Cauldron of Blood miniature from Armorcast--a company that did 40k-scale vehicle versions of Epic models). 

 One of the special rules for the scenario was that we had to roll a die for each unit and character, and on a result of a "1" it was delayed and entered as reserves. The Dwarfs had a unit of Warriors and an Organ Gun affected, while the enemy had a bit more left off--the Tomb Kings especially. One of their Liche Priests and a Hierotitan were delayed (pictured arriving above) as well as a unit of Tomb Guard and a Colossus. 

The Daemons of Chaos found themselves similarly delayed: this unit of Pink Horrors was busy crafting their daemonic spell mastery and bickering with each other about the nature of true illusion to arrive to the battle on time. 

Because the Daemons of Chaos and Tomb Kings had deployed first, they nominally got to take the first turn. However, the Dwarfs managed to steal a march (rolling a six result to start the game) and go first instead. Their thundering fire started to damage the foe, only to be met with a charge from Daemons and Tomb Kings alike on the foe's first turn. On the right flank, the Bloodcrushers collided with the Hammerers. While many Hammerers fell to their attacks, the unit stubbornly swung back and managed to demolish two of the daemonic beasts themselves. Eventually the Hammerers cleaved their way through the foes, though not without time and serious losses of their own. 

 In the center, my unit of Slayers--with a Daemonslayer and four Giant Slayers--that had advanced with Vanguard found themselves attacked from the front by Settra and his charioteer battle standard bearer and on the side by Bloodletters of Khorne. The Slayers died in droves, but they fought back with deadly precision even in their dying moments. After the first combat, they had lost almost half their number but they hung on--and in the latter combat they crushed Settra's assistant and a number of the Daemons, causing the remaining Daemons to disappear and Settra himself to crumble into dust. 

 On the left flank, Tom's Trollslayers led by a Daemonslayer were charged by a unit of Bloodletters and a Daemon Prince of Tzeentch. The Daemonslayer lived up to his name--taking two wounds from the deadly Daemon Prince's attacks but utterly cutting him down with his return attacks. The Bloodletters fared the same in this instance as the last--finding that cutting down a Slayer was as problematic as not, able to put out a lot of wounds on the Dwarfs but taking an unsustainable number themselves. While they hung on and continued fighting, the odds continued to be in the Dwarfs favor. 

 The Tomb Kings' Skeleton Horse Archers used their speed to attack the Dwarf Cannon in retribution--the first turn of the game the cannon managed to completely destroy the Casket of Souls. And while they had numbers, fear, and deadly mounts, the Undead were unable to shift the resolute crew. The next turn they were counter-charged by the Dwarf Engineer who was nearby, and slowly destroyed by the crew. 

 The Plaguebearers found the Irondrakes to be both deadly in their shooting and tricky in their defenses--their magical runes of slowness on the standard caused the Daemons of Nurgle to fail in their charge attempt--yet still suffering a stand-and-shoot reaction. As their numbers dwindled from ranged fire, the Daemons nevertheless continued to press the Dwarf line. 

 The other Daemon Prince (this one marked by Khorne, and a great conversion from a Warcraft figure), enraged by the death of his precious vanguard of Bloodcrushers, rushed headlong into the Hammerers himself. While he killed a fair number of them in his attacks, their stubbornness and retaliation strikes with heavy two-handed hammers proved too much and he fell defeated. 

 The Dwarf Miners turned up on the second turn, thinking they would strike at the ranged units that the Tomb Kings and Daemons had left in their backfield. However, they had miscalculated and forgotten about the reserves of the Tomb Kings themselves: a unit of Tomb Guard mummies and a Colossus appeared behind them. The Dwarfs, now trapped between the enemy forces, were shot to pieces by the great bow of the Colossus and the vile phlegm and harvester cannon of the Soul Grinder--only to find themselves pinned and destroyed by the Khorne Skullcannon and Tomb Guard in combat. 

 With a rumble under the earth, the Tomb Scorpion showed up briefly--only to disappear under the sands again with a delay mishap on its burrowing chart. The Longbeards had been nervous about the foe, but he would prove to not emerge again until the end of the game when it was too late for his deadly pincers to make a difference. 

 With both Daemon Princes dead and Settra the Imperishable suddenly entirely perished, the Great Unclean One decided it was time to carry the forces of destruction on his pox-ridden shoulders. He crashed into the few remaining Slayers with reckless abandon. My Daemonslayer waited within his unit, ready to strike the killing blow against such a deadly fiend with his runic weapons and abilities designed for just such a fight. Instead, he watched as the Greater Daemon not only smashed his unit silly but then stomped him to death--while his own blows only managed to inflict two wounds on the deadly beast. While he died in glorious combat--alone against a Greater Daemon--it was still sad that he failed to defeat the creature he was literally named to slay. 

 The Great Unclean One was then suddenly able to terrorize the entire Dwarf line. The unit of Warriors that had been delayed showed up only to be right in his line of progression. Tom's Organ Gun tried to help out, but it was unable to damage the gigantic foe--it crashed into the unit of Warriors with devastating effect, slaying eight of their number without a single wound himself. Only the nearby presence of the Battle Standard of Goth One-Eye saved them from fleeing (stubborn is absolutely a Dwarf's best friend). 

 Meanwhile the Hammerers ran forward into a unit of Tomb King Skeletons--their binding magic raising not only their own from the sands but those who perished on this soil as well. The Hammerers proved to be true to form as their prior combats: taking casualties but dealing back death double--they ended the game having finally ground through the Skeletons but only with four of their own remaining--too small to play a further role in the battle. 

 The Great Unclean One continued his assault, dropping Dwarf Warriors in droves. It was only as the unit of Warriors with great weapons charged that success was had. Both the Thane Battle Standard Bearer and the Runelord failed to damage the monstrosity--but it was the core of good old great axes that managed to fell the beast from behind. It had wiped out all but two of the Warriors from the unit before it, but its body fell with a sickening crunch from dozens of axe wounds from behind. 

Tom's unit of Trollslayers continued their assault by crashing into the necromancy-infused Hierotitan. Their willingness and ability to strike down even the largest foe aided them here, demolishing the towering construct even as their axes bit and blunted on its stone form. 

The Dwarf Quarrelers charged forward, but met their match against the Tomb Guard and Pink Horrors. While they managed to wipe out the Tomb Guard with their heavy great weapons, the Pink Horrors charging them in the side was too much for them and they fled. They fled as the game ended--scattering before the Daemonic threat. 

The game ended with a fairly resounding victory for the Dwarfs. Tom had lost only his Daemonslayer, and while I had suffered severe casualties in many units, only my Trollslayers, Daemonslayer, and Quarrelers were destroyed at the end of the game. Meanwhile, the Daemons of Chaos and Tomb Kings had taken considerable losses at the hands of the Dwarf artillery and sturdy Dwarf infantry. Two critical factors to Dwarf success from the enemy's side: one, the Tomb Kings battle line was interrupted by some of their units being in reserve from the start by the scenario; and two, woefully poor magic phases for the enemy. I brought three runes of spellbreaking, and only ended up using two. On turns when they had dice, the Dwarfs managed to dispel. But on many turns, the Daemons and Tomb Kings were left with a poor pool or lack of decent targets. And for their own side, the Unbreakable Trollslayers and Stubbornness that was present through the rest of the army proved again and again to be the strength of the Dwarf force--they rarely budge. It was a great game, with great players to match up against. It was also a lot of fun to see some new armies with lots of exciting conversions and old models (Settra's chariot was the old Undead one complete with tailfins and the original banner).

Battles
Total 2015: 19 (Win/Loss/Tie: 12/5/2)
Total 2014: 15 (Win/Loss/Tie: 8/6/1)

Skaven:
7 Wins (Undead 2, Empire 1, T&T Daemons and Dwarfs, Siege Dwarfs and Bretonnians, T&T Daemons and Empire, T&T Dual Undead)
8 Losses (Lizadmen 1, Skaven 1, Empire 1, Dwarfs 1, Daemons 1, T&T Daemons 1, T&T Dwarfs 1, Special Game Nurgle)
1 Tie (Empire 1)

Dwarfs:
11 Wins (High Elves 1, Lizardmen 1, Dwarfs 3, Wood Elves 2, T&T Undead and Dwarfs, T&T Lizardmen and Wood Elves, T&T Chaos Legions and Lizardmen, Team Daemons and Tomb Kings)
2 Losses (Dark Elves 1, Empire 1)
1 Tie (T&T Dual Undead)

Friday, May 15, 2015

Tale of Roberto Contagliocini, Free Halberdier of the Empire

[Note: similar to a few prior posts, unusual and truly epic battles deserve a bit more narrative treatment--and as such, another tale is below (new painting and recap below).

Tale of Roberto Contagliocini, Free Halberdier of the Empire

From the Annals of Joachim von Treitschke, Royal Historian of Talabecland, in Service of Elector Count Helmut Feuerbach, first of his name:

Historical records of Roberto Contagliocini are spotty before the events of The Battle of Wernigerode Spire (Imperial Calendar reckoning 2506). We know that Contagliocini was born in Tilea, and had escaped some manner of criminal record there by moving north to the Empire. He took a position as a Wheelwright's aid in the city of Talabheim sometime before 2503, as I managed to uncover a documents arranging for his unusual (because of his advanced age) apprenticeship to certain mister Claus Stellmacher in the river quarter of the city. At some point, Contagliocini must have purchased the required weapon and uniforms to allow him to muster into a standing regiment of Talabheim Halberdiers, as the next record of him I was able to find was a commissioned painting done upon his joining of the regiment. In those days, the security of the Empire seemed more certain, and the wearing of the Red and White served more as a social club than a military force--no doubt Contagliocini joined to improve his connections to other businessmen in the city in hopes of improving his situation. 


It must have seemed a lark, then, when the Supreme Patriarch of the Colleges of Magic Balthasar Gelt himself raised an expedition that included Contagliocini's Talabheim Halberdiers regiment. Retrieving records from the Colleges of Magic is a lengthy process at the best of times, and little exists of why Gelt assembled the force. Rumors had it that he had recruited the Legendary Valten to help lead his forces. While records of the remaining Golden Order Knights do recount a man called Valten leading one of their columns, it may have been one of the many coincidences (as so-called Valten sightings come every spring as frequently as robins and rain showers). Those same records are what recount the tale of Roberto Contagliocini (or "Halberdier Bob" as the surviving Golden Knights came to calling him--an imprecise nickname at best, and one that my own historical account will certainly eschew). Contagliocini's regiment was joined by a large group of Middenland Halberdiers, two columns of Golden Knights, a group of Stirland Greatswords, a unit of Pistoliers, and an artillery train that contained two Steam Tanks and assorted Mortars, Cannon, and a Hellblaster. The forces were led by Patriarch Gelt himself, aided by the "Valten" amidst the Knights and another of the College of Metal: Detlef Rothbauer. 


In my exchanges with the Colleges of Magic, I did manage to gain access to reading a tome detailing the life and supposed death of Detlef Rothbauer, which shed what little light it could on the battle that defined Contagliocini's career. Apparently the College of the Lore of Metal had been seeking some sort of powerful artifact that lay within a lone spire known as Wernigerode, near the mountainous southern border of the Empire. The record seemed to suggest that Patriarch Gelt and Rothbauer had summoned the army to provide protection for their exploration of the tower, though against who was unclear. The author of the tome about Rothbauer suggested "the viliest [sic] elves that dost drapest [sic] their nether regions in the moss of the forest" were the foes that Gelt feared in his exploration. The account goes on to record that once they reached the spire, the regiment of Greatswords was sent in to investigate while the rest of the army made camp. 


The records of the Golden Order Knights report that it was when the Wernigerode Spire was being searched by the Greatswords that the army of Dwarfs trailed down from the nearby mountains. At first, it was little cause for alarm--the Dwarfs and Empire were frequent allies, and perhaps some strong Dwarf ale could be purchased from their visitors. Patriarch Gelt and Battle Mage Rothbauer left the tower in the hands of the Greatswords and went to parley with the Dwarf commanders. The records detail that there seemed to be somewhat of a commotion surrounding a massive anvil that had been lugged down from the mountains with the Dwarf force. Gelt and Rothbauer seemed to be discussing with three aged Dwarfs, each of whom was shaking their heads and shouting in increasingly loud voices. As the shouts echoed across the field, the Empire forces began to stir and become nervous. The Dwarfs had brought a massive army of their own: two large blocks of Warriors, a group of Crossbowmen, a horde of Thunderers, a unit of Ironbreakers, a unit of Irondrakes, and at the vanguard a barely-restrained group of Dwarf Trollslayers--with their shaved heads, orange-dyed beards, and massive axes. There was also an artillery train that had accompanied the throng, with a total of seven deadly War Machines including an Organ Gun, two Cannon, two Grudge Throwers (as the Dwarfs call their catapults), a Bolt Thrower, and a Flame Cannon with its barrel full of flammable, sticky liquid.


The records fail to recount what happened next, only that in an instant Patriarch Gelt had pulled Battle Mage Rothbauer onto his pegasus and flown back to the Empire lines. With shouts of "get ready for battle, they're attacking!" Gelt arrayed his forces as the Dwarf artillery began to range in. My own educated supposition is that something within the Tower had been up for dispute. The Dwarfs have their own variety of magic, something most closely similar to that of the Lore of Metal that was studied by both Gelt and Rothbauer. What it was that might have lain so close to the wishes of two generally friendly armies that would cause them to come to war must have been powerful indeed: as the Dwarfs showed no mercy in their attack. The Pistoliers were the first to ride to the defense of the Empire, only to be pulverized by a volley of black powder shot from the Dwarf Organ Gun. 


Records of the battle reveal that Patriarch Gelt leveraged his magic to extreme effect in the course of the battle. While it may have been powered by fury alone at whatever slights and insults were expressed from the Dwarf side, his mask gave Gelt a serene visage--a stark difference from the violence inflicted by his magical power. Using his alchemical might, a wave of his hand managed to turn a Runesmith and eight Irondrakes into solid gold statues. 


The details of the Golden Order of the Knights reveal that their first foes on the field were the resolute Trollslayers. While they managed to whittle down the crazed Dwarfs, the deathblows of the dying forces began to cut down their number in worrisome fashion. What was worse is that lesser armies would have fled from such a devastating charge, but the Trollslayers just stood and accepted their fates. The unit bogged down, and many of their number fell to the strong swings of Dwarf axes. 


At the same time, the Greatswords in the tower were fending off the central thrust of the Dwarf army: a Lord and his Ironbreakers. While they managed to hold and repel the attackers, their numbers were dwindling fast. That's when Patriarch Gelt demanded that Contagliocini's unit of Halberdiers replace the Greatswords in the tower. No doubt the men were worried, as the sturdiest of the Empire's foot soldiers had been almost completely demolished by the onslaught of Dwarfs. What chance would they stand? 


Reports of the battle list casualty numbers more than anything else. However, the margins of the Golden Knights records contain a small hand-written note from a prior reader. I'm uncertain if this is true, but it details the fate of the artillery train the Empire brought with them. The entry reads as follows: "First Steam Tank: destroyed by catapult shot crashing down onto boiler, resultant explosion killing all crew and destroying tank. Second Steam Tank: persistent malfunctions in valves and gears left it mostly inoperable, eventually wrecked by fire from enemy Organ Gun. Cannon and Hellblaster: initial success until enemy catapult fire demolished both. Mortars: largely ineffective against the heavy armor and innate toughness of Dwarfs, also destroyed by counter-battery fire from catapults. Must research why such low technology proved so effective. -G.K.B." Who this "G.K.B." was, and how they knew these facts about the battle, remains an unsolved mystery. However, if true it tells much about why the Dwarfs seemed to take such an upper hand in the battle. 


In the history of Rothbauer's death, the author detailed that Rothbauer himself took refuge in the Spire during the course of the battle. It states that he and a Captain of the Empire--whose name is not recorded--took cover there with a unit of Talabheim Halberdiers containing, and I quote: "a most peculiar fellowe [sic] named Roberto Contagliocini. While the other soldiers were prone to panic, Contagliocini's relaxed Tilean accent and cavalier attitude in the face of the Dwarfe [sic] menace heartened his fellows to repel no less than three assaults by the metal-suited Ironbreakers upon their position." 


The accounts from the Golden Order of Knights focused more on the events of the battlefield, and their fallen brethren. The Dwarf Trollslayers cut down every single one of the first column of knights, except the man the author referred to as "Valten". The history details that this mysterious rider cut down all the Trollslayers until he was face-to-face with only the toughest one remaining. While the Dwarf raged and struck with his enchanted axes, the rider managed to avoid the assault and slay the ancient berserker without a single scratch. 


It is at this point that the story picks up again with the Battle Mage Rothbauer, as his history details a moment when the Dwarfs had slain "all the riders below, leaving only a distant line of the horsemen, Contagliocini's dwindling force in the tower, and the two mages from the moste [sic] potent and eternal College of Metal to finish the battle." Whether the so-called Valten perished then or held up the Dwarf lines for some time further is a matter of dispute between the two texts. However, the history of Rothbauer takes a far more self-centric turn at this point in its narrative. According to the text, it was this moment--when only the mages of Metal and a few scattered forces remain--that Patriarch Gelt and Rothbauer truly began to unleash the power of alchemy upon their foes. They worked their magics to enhance the Halberdiers in the tower, summoning cloaks of pure shimmering metal to surround the troops and aid them in defense. While the assaults continued from the Ironbreakers, fewer Halberdiers were dying--however few might be too many. The mages then focused on the Ironbreakers that were besieging the tower. They turned so many of their number into golden statues that only two remained standing alive next to the Dwarf Lord. Gelt then struck down the remaining Ironbreakers with a Searing Doom, and tore the Dwarf Lord's armor asunder with the deadly metal jaws of Ghenna's Golden Hounds--leaving the bearded foe severely wounded, barely alive, and alone at the base of the tower. However, all that energy proved to be too much for Detlef Rothbauer, whose magics unleashed a (again quoting): "dimensional cascade to a plane of pureste [sic] molten flame, in the center of which I caught a glimpse of Rothbauer's  body burned to a crispe [sic] like a morning rasher of bacon." As to who penned the account of Rothbauer, I can only guess that it was Patriarch Gelt himself, as the remainder is a reflection on the nature of the Colleges of Magic and the exploration that death through flames might yield to one with sufficient protections. 


For the remainder of the narrative of The Battle of Wernigerode Spire, I rely upon the accounts of the Golden Order of Knights, penned by those seven who survived the battle--and what second-hand personal accounts of Contagliocini I could record myself. All of these histories detail the fact that the second column of Knights had swung around the side, and were eliminating the machines of war that the Dwarfs had arrayed. 


The tales from Contagliocini himself--passed on to his son, Emiglio, who related them to me--tell of one Knight who remained below. I'll use Emiglio's words: "Dad told me that the last assault had wiped out every one of his fellow Halberdiers. He looked down over the edge of the tower and saw two figures valiantly fighting on below. One was Balthasar Gelt, the magician on the flying horse, who blasted away at the Dwarfs with searing spells of molten gold. The other was a man who had ridden with the central column of Knights. Dad said it was him, it was Valten himself. The man survived for round after round against the Dwarfs that were surrounding him, managing to slay a few each time and hold on long beyond what a single man should. And Dad said 'that's why I fought so hard, Son.' Dad knew that the Empire depended on men like him to be like Valten, to stand up and fight even in the face of overwhelming enemies."


The records of the Golden Order of Knights detail that when the second column arrived back at the center of the fight they became entangled with a massive horde of Dwarf Thunderers. In the distance, they spied the last of their number fall to the Dwarfs surrounding him (again, this mysterious "Valten": who if he fell to the Dwarfs and was slain where he stood could not actually be the mythical farmhand-turned-warrior the peasants whisper about). They also watched as Patriarch Gelt withdrew from the field under fire from the remaining Dwarf artillery. However, the Knights fought on slowly grinding away at the Thunderers. While Dwarf morale held, it became clear that soon enough the Knights would break through and destroy the remaining Dwarf war machines. 


The Golden Knights watched as the Dwarfs mounted a last-ditch attempt at taking the Spire. Four miners that had tunneled up from the far side of the field remained from a unit turned to gold by Patriarch Gelt's parting enchantment. The quartet rushed the doors and presumably made their way up the tower. The account then says that a desperate fight broke out on the battlement, with a lone Halberdier fighting against the four. He slashed quickly, slaying one of the Miners--the Dwarf's body fell the long distance down to the earth with a sickening thud. The Dwarfs then swung their heavy picks, yet failed to injure the Halberdier. His own parries deflected the attacks, despite the assault being driven with the grudge-fueled hatred of the Miners. And despite the odds, the Halberdier's morale held firm in the face of the attack. The Miners, realizing they were unable to even hit him, retreated out of the building. The fleeing Miners seemed to cause the other Dwarfs to give up hopes of succeeding--and with the threat of the Knights breaking through the last Thunderers they retreated from the field. 


The Golden Order of Knights recount dismounting and running up the stairs, and finding the top of the tower slick with blood. In the center, breathing heavily but un-injured, was that single Halberdier: Roberto Contagliocini. Not knowing what Patriarch Gelt had even wanted with the tower, their tiny force had held it for the Empire. The Knights entered Contagliocini's name into their record books, and tell the tale of riding with him back to his home in Talabheim to a hero's welcome. As is always the case with documents from Knightly Orders, their accounts are frustratingly lacking. The last information I could find from them was that Contagliocini carried as spoils a golden pick wrenched from the hands of a transmuted Dwarf miner, along with a large cask of Dwarf ale. According to them, he planned to sell the pick and buy as many whores as Talabheim could offer. Contagliocini's son Emiglio reported a different tale, one of a loving father who settled into a modest business and raised three children until the Empire called upon his regiment again this past Spring. Whether he will return successful and valiant from this campaign is unknown, but the mining pick of pure gold still hangs upon the mantle of his home, waiting for his safe return. 

Gaming Notes

This was a pretty epic battle, with 4,500 points per side, between Tom's Empire versus my Dwarfs. We correctly predicted that it would be a bloody confrontation, but didn't realize just how bloody. He had only one Halberdier and seven Knights left at the end of the game, and most of my units were destroyed or severely decimated. However, it was the "Watchtower" scenario, so all that mattered was who controlled it. And Tom's side controlled it. With a single Halberdier--who managed to make his leadership and push my last unit away on the last turn of the game. In a game that went eight turns long due to random game length. It was truly epic, as my assaults continued to dwindle the forces holding the tower, but they remained firm turn after turn, only to see my assaulting units be utterly demolished by the Empire's magic and shooting. Great game, even though I ended up losing the match.

I also managed to secure a fairly difficult Dwarf Achievement, as my Organ Gun generated 112 shots during the course of the battle. Of course, it hit with less than half of them as for some reason my shooting was really poor. But that's a fearsome number of blasts for an enemy to face, and it cut the right flank of the Empire to ribbons.

On the painting progress side, I managed to add nine more models: one Lord, one War Machine, and seven troops models to complete the front rank of a unit.

 Daemonslayer

This model is an Avatars of War Dwarf Berserker. Given that I'm using the Avatars of War plastics for my other Trollslayers, I figured he would be a good one to add. At some point Games Workshop will do their own plastic Trollslayers (I hope), and I'll make a second unit of those--so I'm keeping these bald, while those will no doubt have the characteristic mowhawks that GW seems to love so much. This was a fun model to paint, as he's got a lot of small gems and runes all over him that I could highlight with the blue, as well as scar tissue on his arms and head--which I always think adds a lot of character to a model.

 Flame Cannon

With this completed, I have at least one of each of the static War Machines that the Dwarfs can field (and two in the case of Cannons, Grudge Throwers, and Organ Guns). The Flame Cannon can be deadly in the right situations, and in this game I had one shot that devastated a unit of Halberdiers--but for the most part it was off-target or ineffective on its first outing. It also managed to destroy itself in a violent misfire. 

Seven Thunderers

For any battle, I always want to have at least the front rank of my force painted. Thus, these Thunderers were needed to finish up that new unit. It was harder to add diversity with them than other units, and I need to get my hands on a fair number of old-style Thunderers to really make the unit look diverse. But I was pleased with the progress here at least.

Battles
Total 2015: 18 (Win/Loss/Tie: 11/5/2)
Total 2014: 15 (Win/Loss/Tie: 8/6/1)

Skaven:
7 Wins (Undead 2, Empire 1, T&T Daemons and Dwarfs, Siege Dwarfs and Bretonnians, T&T Daemons and Empire, T&T Dual Undead)
8 Losses (Lizadmen 1, Skaven 1, Empire 1, Dwarfs 1, Daemons 1, T&T Daemons 1, T&T Dwarfs 1, Special Game Nurgle)
1 Tie (Empire 1)

Dwarfs:
10 Wins (High Elves 1, Lizardmen 1, Dwarfs 3, Wood Elves 2, T&T Undead and Dwarfs, T&T Lizardmen and Wood Elves, T&T Chaos Legions and Lizardmen)
2 Losses (Dark Elves 1, Empire 1)
1 Tie (T&T Dual Undead)